Today we’re sharing more love for our DIY backsplash products. Two satisfied customers shared their experiences with Aspect and Fasade tiles.
Scottie of the blog Saved By Scottie shared her quick kitchen update with our Aspect glass tiles in Morning Dew.
“When we moved into this house almost two years ago, the one thing I really didn’t like (at all) was the kitchen. It’s not set up logically, the cabinet style does not at all go with the house, and it’s very small,” she writes of her ‘before.’
She goes on to describe how easy the project was and concludes, “Would I do this again? In a heartbeat! I still don’t love the kitchen, but it’s SO much better than it was.”
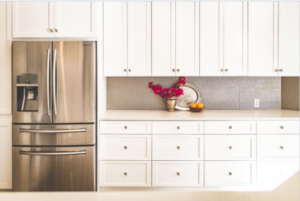
Amy’s kitchen features Fasade backsplash in Hammered.
Amy of the Barefooted Designer used our Fasade backsplash tiles in Hammered in Galvanized Steel. These vinyl panels are easily applied with double-sided tape or construction adhesive, whichever you prefer. She then took it a step further by painting them with a metallic paint she likes.
“One of my favorite things is that even though these tiles look convincingly like metal, you can easily pop a nail through it and hang your art or favorite find onto it. Just try doing that on your tile backsplash,” she writes in her post.
We’re impressed with the projects our customers undertake and their finished products. It really is amazing how much an impact a new backsplash can make in just a short amount of time and with only a little elbow grease. They are beautiful!
Do you want to update your kitchen without spending a lot of time and money? If that sounds appealing, a DIY kitchen backsplash is just the project.
Installing a Fasade decorative vinyl backsplash is one of the easiest DIY kitchen backsplash projects. Measuring 18” x 24” each, these decorative backsplash panels are available in a range of styles and finishes to match any decor. Lightweight and flexible, they install with double-sided tape or tube adhesive, eliminating the hassle of grout.
To install Fasade backsplash, first prepare the area to be covered so that it is clean, dry, flat, smooth and free from dust, grease, etc. You may choose to paint the wall where the edge of panel meets cabinetry, or install edge J-trim to avoid any gaps that show through. Do a dry layout first to determine where your panels will go. You can use a pair of scissors or tin snips to cut the panels to the necessary size.
Determine if you are going to install the panel using double-sided tape or tube adhesive. Regardless of which method you use, you will want to clean the backside of the panels using a paper towel or cloth and isopropyl alcohol. If using trim, slide the trim piece onto the edge of the panel. Apply glue or adhesive strips to the back and press the panel firmly into place when alignment is correct and squeeze out excess air. Finish installing the rest of the panels in the same fashion.
Note: Prior to installation, it is important to understand the overlap feature of each panel. Each panel has two 1/2″ flat edges (the longer flat edge is the top of the panel and shorter flat edge is the right side of the panel). Arrange all panels this way so additional panels can be added to the top or right side of any panel. When overlapping 4 panels, it is necessary to cut a 1/2″ notch in panels 2 and 3 to avoid an overlap buildup that causes a “bump.”
For ideas on how to use Fasade decorative backsplash panels, visit our galleries page.
Thinking of completing a DIY kitchen backsplash project? Let us know what you think in the comments!
The author, Jennifer Griffin of Edmonton, Okla., writes on her blog “Dimples & Tangles” that she never liked the backsplash in her kitchen which consisted of white tiles with red and green stripes. “Perfect in the mid-90’s when the house was built. Today, not so much,” she writes.
When they first moved into their home they undertook a kitchen redo that consisted mainly of cosmetics fixes, knowing someday they’d make major renovations. One such fix was the backsplash, where they used Fasade backplash in Traditional 1 style, Bermuda Bronze finish. You can use construction adhesive or double-sided tape during installation, which is what they did for this temporary fix.
For their more extensive kitchen remodel, Jennifer says they wanted to use the same Fasade panel style but in a different color. This time she painted them to coordinate better with the cabinetry and countertops. She also used them as an accent in the counter/bar area, noting, “These panels are flexible, so all I had to do was follow the wall around and glue it down. It conformed to the shape of the wall.”
A Great Solution
Jennifer says they may change out the backsplash again. “If we go a different route in the future, this will be so quick to pull down and be ready to re-do,” she says. “I’m thinking maybe beveled subway tile? But, we’re good for now and these panels have been a great solution for our backsplash. My sister used the copper color in her kitchen and it looks fantastic. I’ve also seen these used on a ceiling…amazing!”
We think the finished product looks beautiful! Be sure to check out the post for more details and photos and let us know what you think in the comments!
Fasade backsplash, wall panels and ceiling tiles can be purchased at any Home Depot, Lowe’s or Menards stores. There are also many more styles and finishes available online at DIYdecorStore.com.
