Today we’re sharing more love for our DIY backsplash products. Two satisfied customers shared their experiences with Aspect and Fasade tiles.
Scottie of the blog Saved By Scottie shared her quick kitchen update with our Aspect glass tiles in Morning Dew.
“When we moved into this house almost two years ago, the one thing I really didn’t like (at all) was the kitchen. It’s not set up logically, the cabinet style does not at all go with the house, and it’s very small,” she writes of her ‘before.’
She goes on to describe how easy the project was and concludes, “Would I do this again? In a heartbeat! I still don’t love the kitchen, but it’s SO much better than it was.”
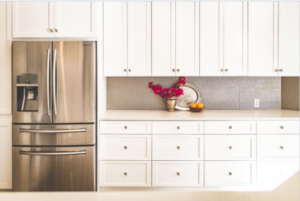
Amy’s kitchen features Fasade backsplash in Hammered.
Amy of the Barefooted Designer used our Fasade backsplash tiles in Hammered in Galvanized Steel. These vinyl panels are easily applied with double-sided tape or construction adhesive, whichever you prefer. She then took it a step further by painting them with a metallic paint she likes.
“One of my favorite things is that even though these tiles look convincingly like metal, you can easily pop a nail through it and hang your art or favorite find onto it. Just try doing that on your tile backsplash,” she writes in her post.
We’re impressed with the projects our customers undertake and their finished products. It really is amazing how much an impact a new backsplash can make in just a short amount of time and with only a little elbow grease. They are beautiful!
We’ve been getting a lot of love for our Aspect products in the world of DIY blogger adventures. I wanted to share three recent posts by creative bloggers who each did something unique to three different rooms with these handy peel & stick tiles. It’s a little something I’m going to call the Wednesday Roundup.
In the first post, Ariel explains how she used our Aspect Glass 3×6 tiles in Frost in her bath. However, as a renter in a PMQ (Private Military/Married Quarters provided to members of the military and their families in Canada), she had to be careful about doing something permanent. She wanted to use the tiles in a way that they could be removed when their housing assignment changed. Enter foam core boards. Read all about her creative installation here.
Weathered Quartz Backsplash
Aspect Peel & Stick tiles in stone update this kitchen.
In the next post, Steph and Vicki of Mother Daughter Projects detail how they installed Aspect Peel & Stick stone tiles in Steph’s kitchen. They used our Weathered Quartz color and detail how they completed the project step by step, as well as with a video. You can read all about their project here.
The bed in this pop art kids’ makeover features our Aspect metal peel & stick tiles.
The third post comes to us from Jenny who participated in The One Room Challenge™, a widely anticipated biannual event every April and October. With each round, 20 design bloggers take the challenge and transform a space. Jenny chose to a do a pop art bedroom makeover for her son Josh. She used our Aspect Peel & Stick metal tiles to accent his bed. You can read all about it here.
We love reading about blogger adventures with our products! If you have something you’re proud of, please share it!
If you’re a fan of instant gratification, that may be in conflict with your love of DIY projects. Most DIY projects require some elbow grease and more than a little time. But Crystal (of the blog Happily Ever Uncluttered) recently discovered that you can accomplish a kitchen upgrade in less than 3 hours when you use Aspect Peel & Stick Stone Tiles.
Here’s what she had to say: “We found the tile we wanted and application of the product took less than three hours. Three hours! Usually for DIY projects I always have my husband in my back pocket for the labor part of it all. But, I am excited to tell you that I did this project with no husband in sight. In fact, I didn’t even tell him I was going to do it. He left for work and before he got home that evening our kitchen looked different. How fun is that!!!”
The kitchen upgrade in less than 3 hours post is here, so be sure to read the whole thing. There’s tons of great information on organization and much more!


